Online presence plays a crucial role in establishing one’s identity and brand; a simple yet effective element like an avatar creation can make a significant impact. Whether you’re leaving a comment on a blog, engaging in discussions on a forum, or featuring in an online website directory, your avatar becomes your virtual calling card, instantly recognizable next to your name. However, maintaining and uploading the same image for each platform can be a tedious and time-consuming task. Imagine if there were a way to have a universally recognizable avatar by employing a simple email address association, automatically appearing on multiple websites and their apps without repetitive uploads. You can benefit from Gravatar’s features on its website or by downloading the Gravatar app.
What Is Gravatar?
Avatars come in various forms, allowing individuals and businesses alike to express their unique personalities and brand identities. They can be professional photographs, charming cartoons, pixel art, or even a brand logo, serving as an immediate visual representation of who you are or what your business stands for.

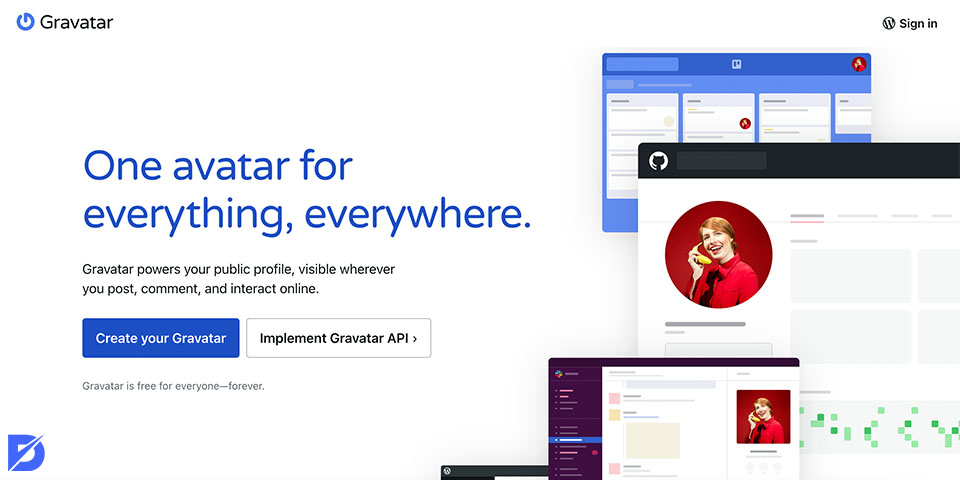
And this is where Gravatar steps into the spotlight as a game-changer. Gravatar, short for Globally Recognized Avatar, revolutionizes how we manage our online identities. It provides a consistent avatar experience across multiple websites that support the service. Gone are the days of repeatedly uploading your avatar image for each platform you engage with. Instead, create a Gravatar for your profile and upload your preferred image just once on the website. From there on, whenever you comment on a blog, guest post on a website, or appear in a Gravatar-enabled site’s directory, your chosen avatar automatically accompanies your identity, ensuring you’re always recognizable and remembered.
Why Use Gravatar for Avatars?
Consistency is key when it comes to online branding. You might ask what Gravatar is used for; however, there is no single answer to this question. Using it ensures that your chosen image remains consistent across all platforms where you engage. A picture is worth a thousand words, they say, and that rings true when it comes to avatars. Displaying your picture alongside your comments or posts helps others associate your words with a face, creating a more personal and memorable experience. The stronger connection formed through your avatar can increase website traffic as people are more likely to click through to learn more about the person behind the avatar.
The beauty of this site lies in its flawless integration with multiple websites. Setting up a Gravatar account and selecting your preferred profile picture means it will automatically be displayed on all Gravatar-enabled sites. This eliminates the hassle of uploading images separately for each platform, saving you precious time and effort. Gravatar’s user-friendly interface makes it a breeze to create Gravatar and manage your other custom avatars. You can easily upload, crop, and adjust your image to represent your online identity perfectly. Lastly, the best part? It is entirely free, both for users and website owners and developers. You can easily generate as many free Gravatar images as you need for yourself and your audience.
How to Use Gravatar
This guide will walk you through the simple steps to integrate Gravatars into your site, creating a more dynamic and engaging user experience. From customizing avatar display options to setting up default images, we’ll cover all the essentials to make your site come alive with vibrant, visually striking profiles.
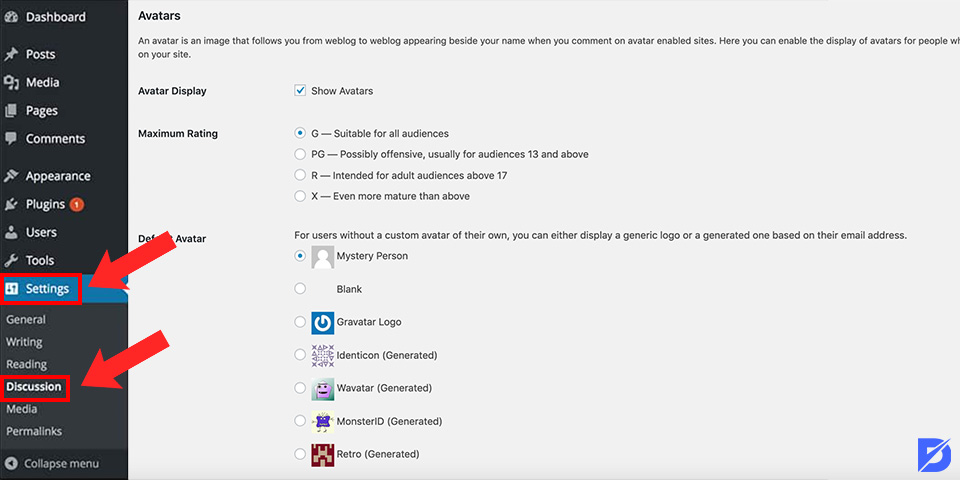
So, as an administrator, fasten your seatbelt, and get ready to transform your website. Navigate to the Settings > Discussion section, where an array of avatar options awaits. You can toggle Gravatars on and off, ensuring complete control over their presence on your site. Additionally, you can set the maximum rating for images based on their appropriateness, customizing the visual experience to match your site’s preferences.
For those users who haven’t created an account, fear not! WordPress offers an ingenious solution through its default avatar feature. By selecting a “generated” Gravatar icon you created, you can provide a personalized touch to non-Gravatar users without requiring them to sign up. Every time these users engage with your site, they’ll have a consistent and unique avatar next to their name, enabling you to recognize these people within your community.
Creating an Account
To activate the Gravatar creator for an account, visit the website and click “Create Your Own Gravatar.” You can sign up using a WordPress.com account or log in with an existing one. Customize your profile with a background image and color to add a personal touch. Lastly, boost your online presence by including links to your website and social media accounts.
Uploading and Managing Avatars
Once you’re in, head to the Manage Gravatars page and upload your preferred image (up to 10 MB). After uploading, crop the image to your desired size and set an appropriate rating based on its content. Now, proceed to complete your profile details, such as your display name and a short bio, and save the changes.
Customizing Your Gravatar
Customizing your Gravatar image in WordPress requires a slightly different approach than directly changing it from the dashboard. Instead, log in to your account and add a new image. However, to enhance the image customization options, you might need to utilize WordPress plugins developed specifically for this purpose. You can use a Gravatar generator if you level up your experience further.
If you prefer the convenience of managing your Gravatar directly from your WordPress dashboard, the “Basic User Avatar” plugin is the way to go. Here’s a simple step-by-step tutorial to get you started:
- From your WordPress dashboard menu, navigate to Plugins → Add New.
- Use the search box to locate the “Basic User Avatar” plugin. If it is challenging for you, you can learn how to install WordPress plugins.
- Install and activate the plugin to unlock its features.
- Once the plugin is active, head back to the WordPress dashboard and visit Users → Your Profile.
- Look for the “Upload Avatar” field and select the new image file you want to use for your Gravatar.
- To apply the changes, click “Update Profile,” your new customized Gravatar image will be in place.
Using Gravatar with Different Platforms
When you contribute to blogs or publish posts, Gravatar ensures that your unique avatar appears alongside your comments or articles. Once linked to your email, your avatar will automatically accompany your contributions to Gravatar-enabled blogs.
- Gravatar enhances your forum presence by displaying your chosen avatar next to your username. When registering on a forum, use the same email associated with your account to ensure consistent representation across multiple platforms.
- While Gravatar is not directly integrated with major social media platforms, you can still use it indirectly. Many third-party apps and services allow you to sync your Gravatar with social media accounts, enabling your chosen avatar to be displayed on platforms like Twitter, LinkedIn, and Facebook.
- Extend your Gravatar presence to your email signature, giving recipients a visual cue of your online identity. Many clients support Gravatar images, providing a professional touch to your communications.
- If you run a WordPress website, enabling Gravatars for comments is straightforward. In your WordPress admin area, navigate to Settings → Discussion and check the “Show Avatars” option.
Integrating Gravatar with WordPress
To enable Gravatar on your WordPress website, follow these steps:
- First, log in to your WordPress admin area and navigate to Settings → Discussion.
- In the Avatars Display section, you’ll find the option to enable Gravatars – make sure to check the “Show Avatars” box.
- Set a maximum rating for Gravatar images, ensuring that appropriate content is shown on your website. Additionally, you can choose a default avatar for users who haven’t set up their own Gravatar. You can even select Gravatar’s logo as the default option.

- To add a different default avatar option, you can make adjustments to the functions.php file. First, upload the new default avatar image to the WordPress Media Library by going to Media → Add New. After uploading, copy the image URL from the attachment details.
- Now, navigate to Appearance → Theme File Editor in the WordPress dashboard.
- Locate and open the functions.php file and paste the provided code snippet into it.
- Be sure to replace the placeholder value in $new_avatar = ‘URL’ with the URL of the new default profile avatar you uploaded earlier.
- This code snippet will add the custom avatar to the list of default avatars on your site.
- Once you’ve made the necessary changes, click “Update File” to save the modifications.
- Afterward, return to the WordPress admin area and go to Settings → Discussion.
- The custom profile picture will now be available among the Default Avatar options if everything is done correctly.
- Select the desired avatar and remember to save the changes to complete the integration process.
Now, your WordPress website is integrated with Gravatar, providing users with a personalized and visually engaging avatar experience.
Benefits of Using Gravatar for Unique Avatars
Much like a profile picture for global brands, Gravatars become a vital element for your online activities, including writing, marketing, and more, akin to how logos are crucial for real-world businesses.
Having a Gravatar offers a myriad of advantages, making it an invaluable tool for building and strengthening your online presence. One of the significant benefits of using Gravatar is the added professionalism it brings to your WordPress site. Having a Gravatar, complete with your name and relevant information, lends an air of credibility, making it easier for visitors to identify you and access your other profiles, such as blogs, Pinterest, and email.
Another advantage lies in networking and promotional opportunities. By connecting with other users through Gravatar, you can expand your network and effectively promote yourself online. You can also check other useful WordPress plugins.
Conclusion on Creating Avatar with Gravatar
In this comprehensive guide, we’ve explored the step-by-step process of setting up a Gravatar account, customizing your profile image, and integrating Gravatar with WordPress. Users gain the invaluable advantage of presenting consistent online profiles across various websites, thereby bolstering their brand recognition and leaving a lasting impression on their audiences.
All it takes to access Gravatar’s services is a WordPress.com account. Users can effortlessly showcase their public profile and unique avatar alongside their posts by using the same email address for commenting on Gravatar-enabled websites. We hope this article has provided valuable insights into the world of Gravatar and its wide array of benefits.
Frequently Asked Questions About
Yes, you can. To set up a custom avatar, you can visit the Gravatar website, sign in with your email address, and upload whichever image you want!
Certainly, with Gravatar, you can create and associate multiple avatars with different email addresses, allowing you to display your preferred avatar on various websites according to your choice.
If you’ve changed your email address, make sure to re-assign your Gravatar to your new email address in the “My Gravatars” section. Sometimes, changes to your avatar may take a few hours to be visible due to caching. To see the changes immediately, you can clear your browser’s cache. Additionally, ensure that the “Show Avatars” setting is enabled in the Discussion Settings to display Gravatars on widgets. If your Gravatar is still not showing on blog pages, it could be due to a high image rating. You can check and adjust the image rating on gravatar.com.


No comments to show.