If you have a Google business profile and would like to change your business address, we will provide directions. Business information should always be up to date. If it is not, it will be difficult for your customers to find you. You can edit more information in your Google My Business account. If your business is moving to a new location, you can use Google’s business address change program. You can register your business with Google without creating new listings. The steps to add and edit a business address are as follows:
- You must be logged into Google My Business.
- If you have more than one location, you need to select the area you want to edit.
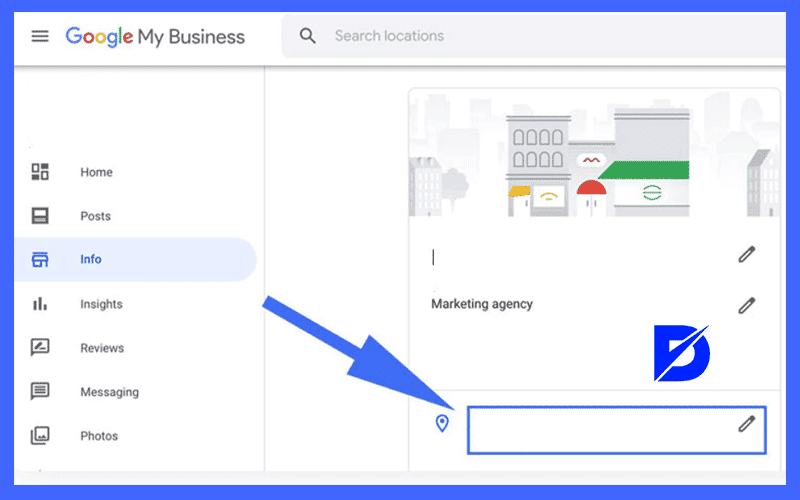
- In the menu, you need to click on the information tab.
- From here, you should also click on the address bar.
- After entering the address, you need to click on the apply tab.
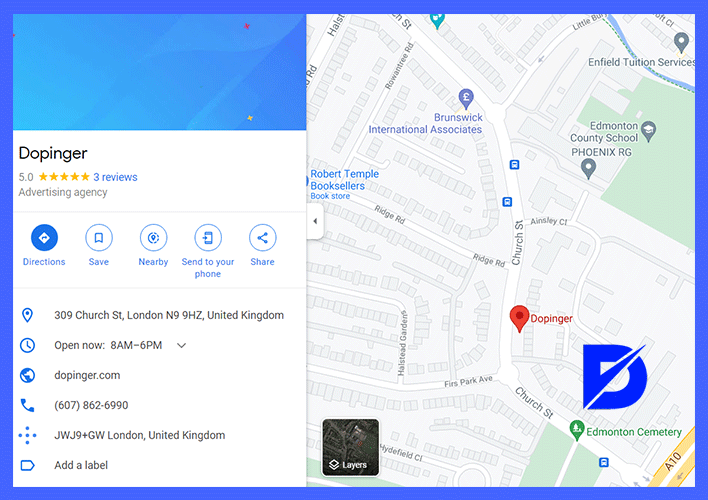
- Highlight your business location on an open map.
- After you have highlighted the location, you can finish editing by clicking on the insert tab.
Why Should You Change Your Google Business Address?
When you change the location of your business, you need to make an address change so that customers who call you are not redirected to the old address. On the map, you should remove the old location and mark it as moved. Customers who do not have access to up-to-date information can opt out of your business. They can also report incorrect directions for your business.
Google offers support to businesses to ensure they always provide up-to-date information. If the old address information is showing up in search results, you are losing customers for nothing. If you want to be accessible to anyone searching for products or services, you should always keep your Google address information up to date. Companies that provide incorrect information are not trusted.
You can always use the update features to provide accurate information. Google will provide you with the necessary instructions to move your business. If you follow the above steps, you can easily move your business to a new address. If you are moving in the real world, you should also move in the virtual world.

Google Business Address Change and Other Arrangements
Google offers many options for editing your business profile. The fields you can edit besides changing your Google address are business name, category, service region, opening hours… You can update all the details in your Google business profile anytime you want. It is much better for you to be able to edit all the changes instantly. You can also use Menu or Services sections to describe the details of your services. However, these are only available in mobile apps. You can also write a short description of your business. You can briefly talk about the aspects that make you stand out. With the menu and service editor, you can provide much more detailed information. The better you use Google’s capabilities, the better it will be for your business. Remember that customers always prefer businesses that have much more information about them.
What Is the Process for Editing Google Maps Locations?
If you think you made a mistake when adding locations to Google Maps, or if you want to change locations, you can perform these operations from your mobile phone or computer. In these areas, you can set, change, or delete an address.
Time needed: 5 minutes
To edit address information contained in Google Contacts via mobile phones, you’ll need to sign in to the Google Maps application.
- First, tap ‘Saved’ and then tap ‘Marked.’
Go to the ‘Other’ section next to the address, and then tap Edit home or work address.
- To add Google Maps addresses to computers, you’ll need to sign in to Google Maps.
Enter the home or work address in the search box. dec.
- If you want to change the address, click on “Edit.”
Click “Save” after you have entered a new address.
Following these steps will allow you to share your address information through Google.

How Do I Verify the Location I Have Added?
When you add a location on the map, you can add your home or work address on my page. However, after these additions, the company requires verification. The most common verification you can use for this is with an ’email’ address. Google sending you the verification code no later than 15 days, you can complete your transactions after saying ‘Verify Now.’
Tools You Can Use to Change the Address
Now, let’s take a look at the tools you can use to change the Google address.
1. Change of Address Tool
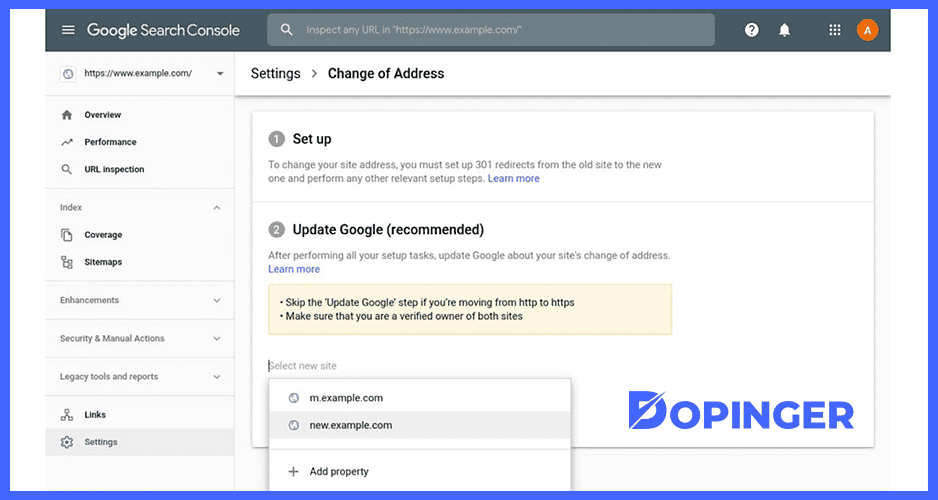
After completing all the preliminary work is done and the redirects are activated, there is a tool that we can use to specify the migration of the website to Google, and that will make our work easier: the change of address tool. After selecting the old site and the new site in this tool, the signals will be processed in a shorter time. In this change tool, you need to handle each subdomain separately, if any.

2. Google Search Console
If you change the address of your website, for example, 1234.com – 12345.com, the first thing you need to do is a 301 redirect from your old domain to the new domain. Suppose you properly 301 redirect the old domain to the new domain. In that case, this may send a message to all the search engines and replace the old domain’s pages indexed in the search engines with the new one, but if your site has many pages and is a large site, this will take a lot of time and probably some pages will also appear in the old domain. In this case, using the change of address tool, which is actually an old but little known tool in the Google Search Console settings, will speed things up considerably, and the transition will be completed without errors.
With the Change of Address tool, you notice that the old domain name has moved to the new domain. This tool first asks you if you want the site to be 301 redirected. If there is a redirect, you can do so. Also, there is a condition that you must be the verified owner of the old domain name to be moved and the new domain name. You cannot use this tool if you are an authorized person.
What Happens When You Use the Change Of Address Tool?
When you request an address change through Search Console, Google is instructed to mark crawling and indexing your new website to crawl your old website. In addition, various signals are transmitted from the old website to the new website, and Google is instructed to favor the new website over the old website when determining canonical pages. These processes continue for 180 days after the migration starts in Search Console. Google won’t delete the old site from the index and if the old site has URLs and may still appear in search results. If you have similar pages on the new site, you can reduce the number of old URLs appearing in search by redirecting from the old site to the new site and using the rel=canonical tags.
Successfully Changing Address
If you’re going to change the address, you better do it right without any problems. Now, let’s take a look at the steps to change the address successfully.
1. Determine the Requirements to Get Started
You should make your choice among the alternative systems that can be transported. These include HTML page migration, PHP software, ASP, ASP.net software languages. Among these systems, you should choose the most suitable one for you. You will minimize your risk of error if you take a step-by-step approach to migration. Migrating an HTML site is simple, easy, flexible, and fast. It is generally preferred. With a transfer program, you can easily complete the process by transferring your files from the current hosting to another server.
Link issues are one of the most common problems with this transfer. At this point, you should be very careful and remove old domain names. Since PHP software code is open source, migrations can be smoother. In this software, in addition to WordPress, Joom, Opencart, or similar pre-built systems, special software sites can also be moved. The critical point here, and more than half of the work, is to transfer the database to the server without any problems. Then you can move your files to the server. After this process is complete, API, etc., remain to make connections. In the other ASP, ASP.net software, you need to know the windows based program. It is a program with rules and limits. You need to start with the optional options that are offered to you.

2. Develop a Plan for the Migration of the Website
For the migration, scope and schedule, identify the project team, create the website access control list for each task, budget and resource list should be created.
3. Testing Phase of Your Website
Regardless of whether it is an individual or a company, the testing process is an unavoidable procedure in web design and website transfer processes. Although it is done professionally, you own the work and should therefore be in control of it. Also, you need to have more than one backup copy of your website to avoid data loss during website migration and eliminate past mistakes.
4. Tracking Your Website Migration
Even after you have completed your website migration checklist, your website needs to be monitored and tracked. It is very important to monitor your website’s ranking and traffic, even in the months following your website move. Your ranking or traffic status can serve as warning signs of problems with your company’s website conversion. A drop in traffic and rankings immediately after the migration is normal, but long-term drops can indicate a problem with your website migration. For example, you should not forget to set up redirects. Without a redirect, search engines like Google can not tell that you have moved the relevant page or content to another site. In this case, your business will fall in the rankings, which will have a significant negative impact on your website traffic.
Brief Information About Google Change Address
Although it may seem complicated, you can actually change the address by following a few simple steps. The business information should always be up to date. Otherwise, it will be difficult for your customers to find you.
Frequently Asked Questions About
First, sign in using the Google My Business feature. Then, sign in with your Google account and enter your work address. After choosing how you want your workplace to look on the map, enter a phone number or a link to the workplace’s website in the area you want. Finally, click the red banner at the top for the verification process and complete the verification process by saying Verify Now.
Sign in to the application using the device that has the IOS operating system. Then open your Google account. Then accept the terms of use and complete the registration by pressing the Next button.
Sign in to the Google Maps app to claim a workspace. Then enter the name of the workplace in the search box. Then select one of the phrases, “I am the owner or manager of the business.” Finally, go through the verification process and complete the process.
It was a free service, and there were no time restrictions either.
Google my business is a business account service offered by Google. It provides services to add your business to Maps, add details like contact information and reach out to customers quickly.


No comments to show.